
Video Assignments
Completing a video assignment
Create video presentations online using Video Assignments. You have the option to record your video separately with an external video camera and then upload the video file to Bongo or you can use your webcam and microphone to record it directly in Bongo. You can also combine multiple video files into one submission. And you can add image files and document files for visual aids. For example, your presentation slides can be exported as JPEG images, or you can use a chart or graph made in Excel that is also saved as an image file.
For more information, visit the Assignment Overviews or Assignment Basics support sites for details on how to complete the following assignment types:
Peer review a video assignment
You may be required to review the submissions of other learners in your class. To learn more about the peer review process, visit the Peer Review page.
Submitting a Previously Recorded Video
If you would like to submit a video you have previously recorded:
- Choose Select Video if the video is stored on your device (laptop, PC, phone, tablet)
- Navigate to your video by clicking Select File
- Select your video and click Begin Upload (Note the file type and file size restrictions shown)
- Wait for video to upload (times vary depending on size of video and internet speeds)
- Be sure to check back to ensure it processed and submitted successfully
Recording a Video in Brightspace
If you want to record a new video directly into Brightspace using your webcam and microphone:
- Click Select/Record Video, and then click Record Video
- If prompted, allow your browser permission to use your mic and webcam
- Press Record when you are ready and Stop when finished
- Review your video to see if it is what you want to submit
Adding Visual Aids
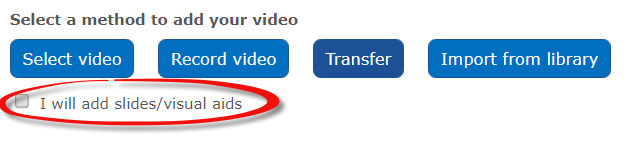
If your instructor set up your assignment so that you can add slides, you will be able to check the box next to I will add slides/visual aides before you add a video.
Once your video has finished processing, you will be able to add slides to your video. If you forgot to check the box prior to adding your video or changed your mind, don’t worry! You can still add slides.
In order to sync slides with a video on YouSeeU, you must first save your PowerPoint slides as image files, and then upload them to your video. For help saving PowerPoints as images, view the following resources:
- Saving Slides as Image Files: Windows
- Saving Slides as Image Files: Mac
- Syncing Slide Images to Videos
Tips For Recording a Video
If you are recording your own video, here are a few tips that may help:
- Lighting is important. Make sure you are lighting up your face from the front, natural lighting is a good source of light.
- Ensure that there is no light from windows or lamps behind you because the camera will automatically adjust and cause your face to be dark.
- If answering a simple discussion question or oral exam, frame your head in the upper middle section of the frame. Please do not position the camera so you have to look down at it.
- If doing a presentation without an audience, frame yourself from the top of the knees up. The camera lens should point straight across, about mid torso high. Use whatever is available to position the camera level and at the right height. Do not have the camera positioned so you have to look down at it.
- If you are doing a presentation in front of a live audience, you will have to position yourself slightly back to ensure your audience is in the frame. Here you will likely need a full body shot with your audience’s heads backing to the camera, allowing a gap for the camera.
Reducing Video File Size
If you need to reduce the file size of a video or want to record a video outside of YouSeeU, you can use Windows Movie Maker if you are using Windows or you can use iMovie if you are using a Mac.