Screen Sharing and Whiteboards
Share Screen Setup
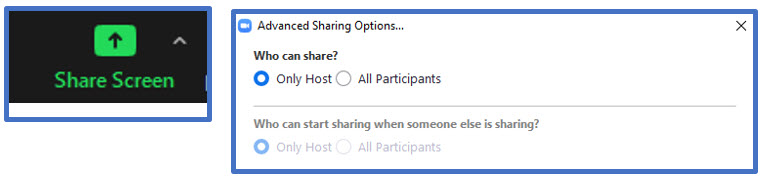
The Share Screen will allow the teacher to share the whiteboard, their desktop, music or computer sound, etc. In the image below, the teacher can allow all participants to share their screen. (This menu is displayed by clicking the up arrow on the Share Screen button).
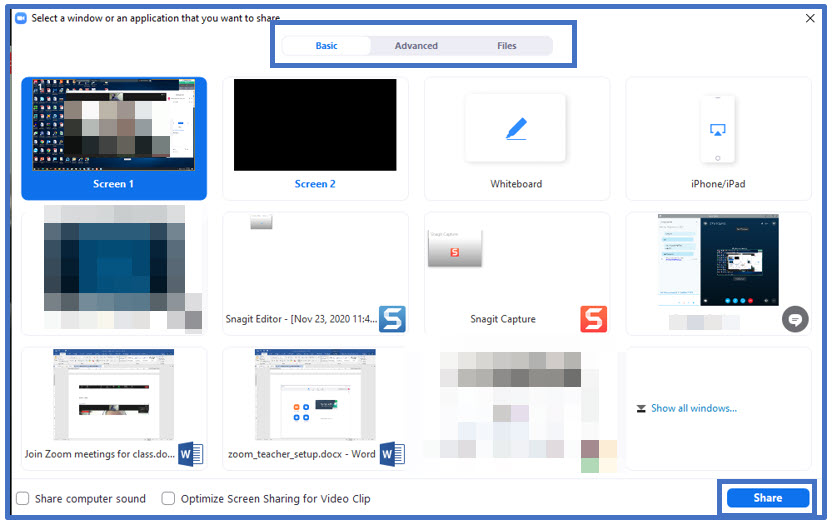
Once the teacher selects the Share Screen, a window will appear as shown below giving you several options.
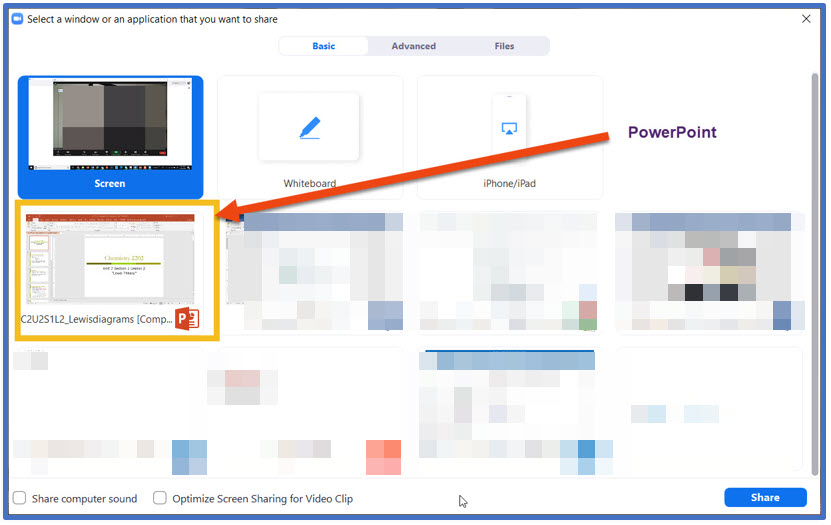
You have the Basic, Advanced, and Files options. The Basic option gives you the Whiteboard option or any Screen option that you have recently opened. Once you select an option, you must then select the blue Share button below.
Sharing a PowerPoint in Zoom
There are two methods demonstrated below. If you have using one monitor follow the steps below for Method 1. If you are using more than one monitor skip method 1 and use method 2.
Method 1: Single-monitor setup with slide show in full screen
- Open the PowerPoint file you want to present.
- Start or join a Zoom meeting.
- Click Share Screen in the meeting controls.

- Select your monitor then click Share.
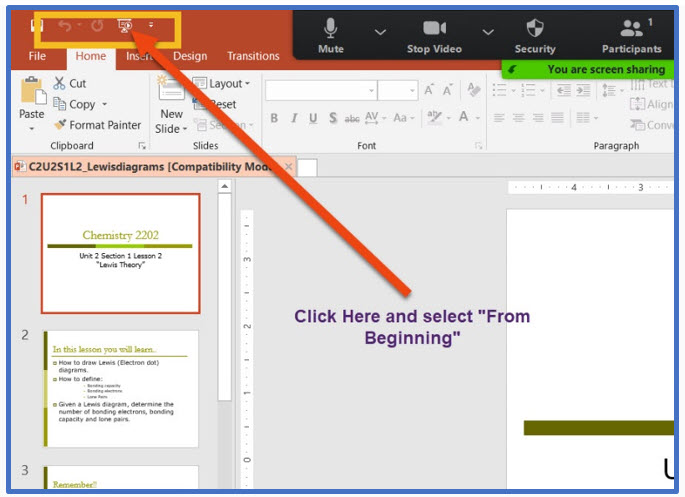
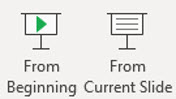
- While sharing your screen, switch PowerPoint to slide show mode by clicking the slide show tab > From Beginning or From Current Slide.
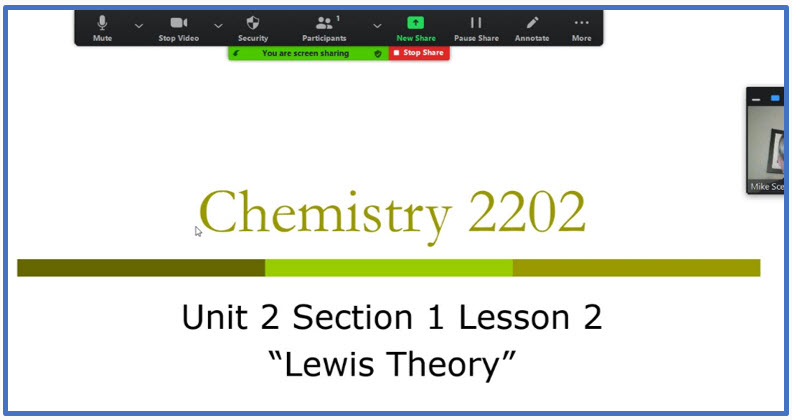
Your Screen may look like this while presenting with the Zoom menu options above your presentation:
Method 2: Dual monitors with slide show and presenter's views
(IF YOU ONLY HAVE ONE MONITOR SKIP THIS SECTION AND MOVE TO THE WHITEBOARD SECTION)
Follow these steps if you are using dual monitors and want to present your PowerPoint file in one monitor while viewing the presenter's notes in another monitor.
- Open the PowerPoint file you want to present.
- Start or join a Zoom meeting.
- Click Share Screen in the meeting controls.
- Select your primary monitor then click the Share button. If you are not sure which monitor is your primary, select the one that PowerPoint opens in.
- While sharing your screen, switch PowerPoint to slide show mode by clicking the Slide Show tab > From Beginning or From Current Slide.
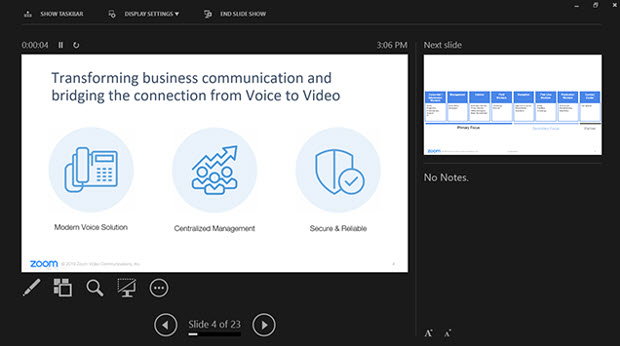
If you correctly shared your primary monitor, participants will see the PowerPoint in slideshow view. The red border indicates the monitor you are currently sharing. - The presenter's view will appear on your secondary monitor. Use this to view your slide notes and control the presentation.
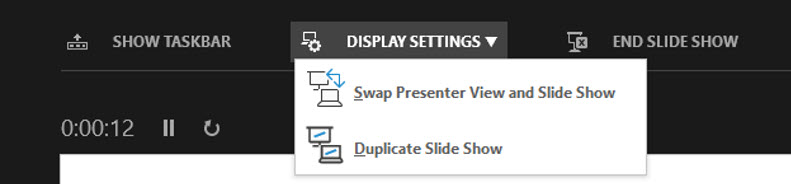
- If you are not sharing the correct monitor, click Display Settings then Swap Presenter View and Slide Show. PowerPoint will switch the monitor that is used for slide show view.
- Alternatively, you can click New Share on your screen share controls and select the screen showing the PowerPoint in slide show view.

You should probably stop sharing and presenting your PowerPoint now before moving to the next section.
Whiteboard/Menu Setup
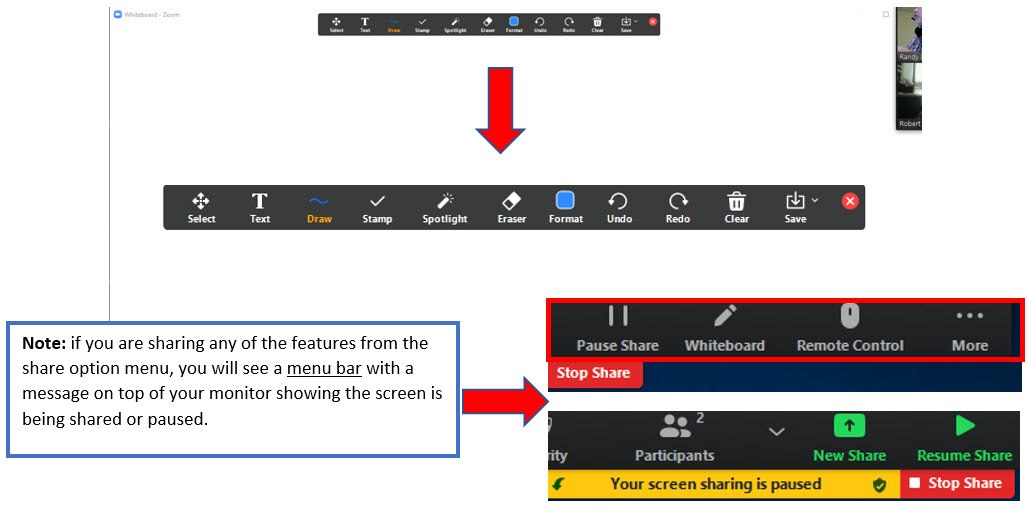
If you select the Whiteboard (this is under the share button), this is what will appear as shown in image below. (The menus may appear on another screen if you were previously sharing a different screen.)
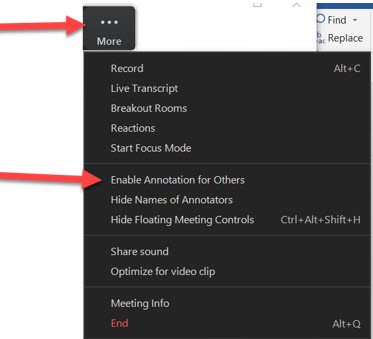
To allow students to annotate on the whiteboard click on More... and then Enable Annotations for Others. Please note that this turns on this permission for ALL participants.
Notes about Sharing/Navigating Whiteboards
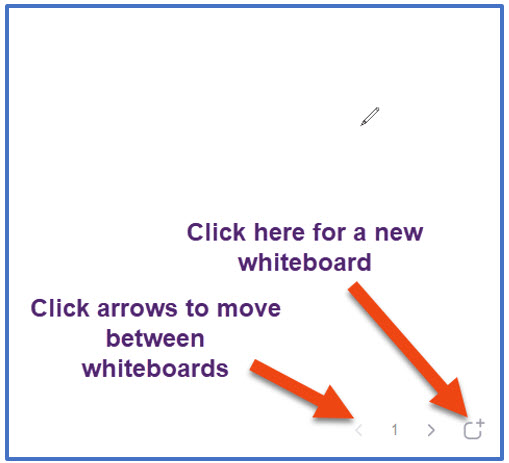
When sharing a whiteboard, you can add a NEW whiteboard and then move between whiteboards by following the steps on the screen below. Note: This is located in the bottom corner of the Whiteboard.
Notes About Annotating Presentations/PowerPoint
When annotating on a PowerPoint using the Zoom pen tool the annotations are persistent, but PROBLEMATIC. When you advance to another slide in your presentation, the annotations created on a previous screen remain on the next screen and so on. (Essentially a screen marker.)
A work around would be to use the pen tool from Power Point to annotate.
Notes about saving whiteboards or Presentations
When saving whiteboards or Presentations, click the Save button while presenting. There is an option to save as either a png or pdf. Select PDF. The whiteboard or presentation slide is saved as an individual file on your computer. You will need to collate these files into one document to create a class set of notes.
Advanced Sharing Option Setup
When clicking the Share button, the second choice you have is the Advanced tab. The Advanced option is shown in the image below. Here, you have a choice of selecting virtual background using PowerPoint, video, computer sound, or if you have two cameras you want to share. If you select one of the options, you must select the blue Share button.

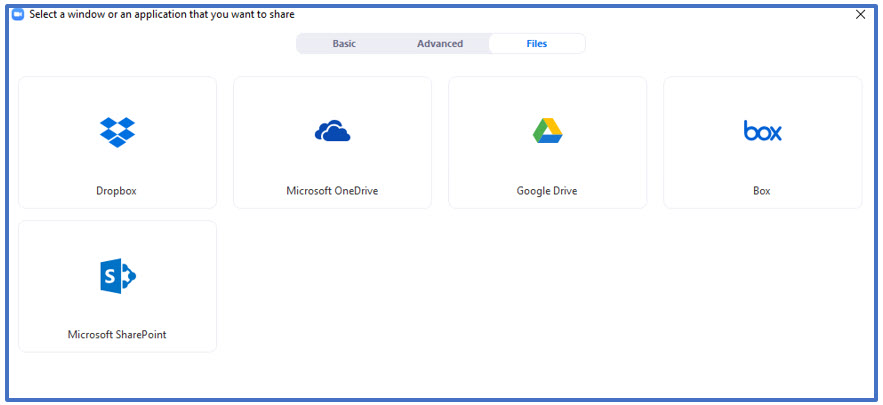
File Sharing Option Setup (This feature is not yet available)
The last option after you click the Share button is the Files tab. You have several possibilities to choose from, normally for some of us it would be the Google Drive. Note: Zoom needs permission to access the Google Drive this is not yet available. If you select one of the options, you must select the blue Share button.