Interface Layout and Features
Anatomy of Zoom
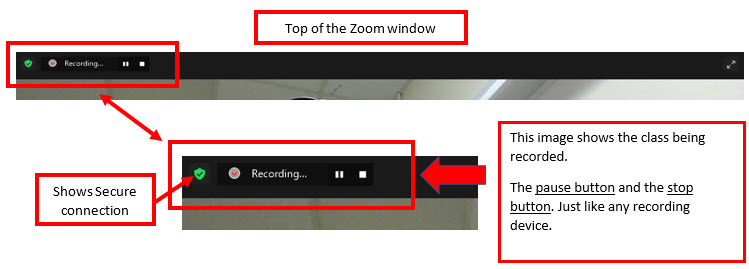
The features of the Zoom meeting window will be explained showing the selection options at the top of the Zoom window and the bottom of the Zoom window. The top of the window (in the image below) only has two buttons and they are pause recording and stop recording (because this session was being recorded). Each of these options will be explained in detail throughout this document.
The bottom of the Zoom window is shown in the image below and has several options. Each will be explained in detail later in this document.

Student Entering the Room
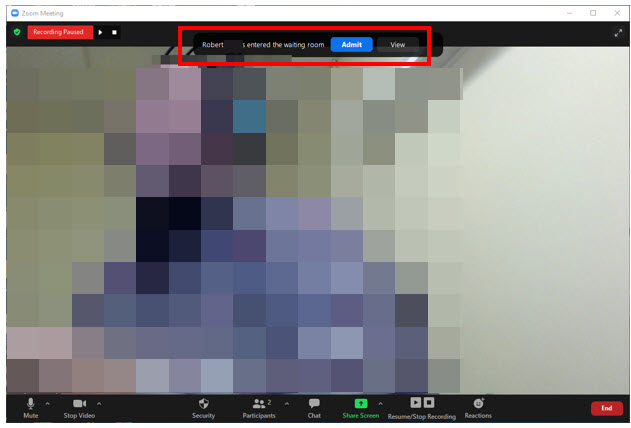
If a student tries to enter class before you, they may be placed in a waiting room if you have this feature turned on. An example of a student joining class is shown in the image below. You will see a message of a student entering a waiting room asking if you want to Admit him/her or View the student in the room. Usually in this case, you would admit the student to your class.
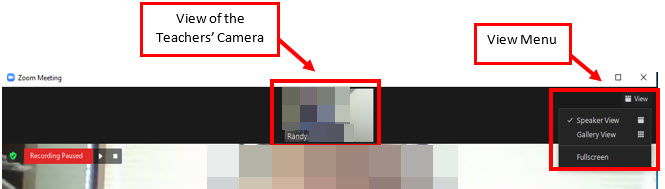
If you admit a student to the room, the teachers’ camera will appear at the top of the Zoom classroom. In addition, you can control the way you view the students in your classroom from the View menu (Speaker View or Gallery View). If you are the only person in the room you will not see the view menu.
Menu Buttons of Zoom
The menus will be explained in detail using the submenu as shown in the image below.
Audio
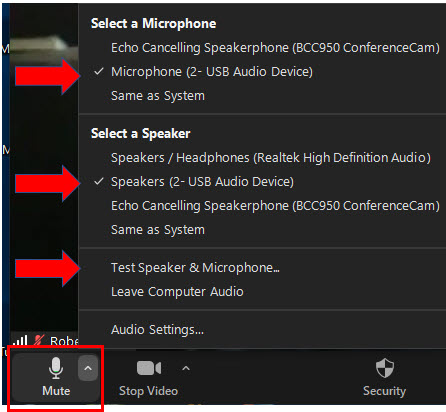
The first menu of the classroom is the Mute button. Here, you can setup your audio to test your speakers and microphone. In addition, it will display your current microphone and speakers by displaying a check mark as shown in the image below.
Click the up arrow to display the options and click the Mute button itself to mute and unmute.
Video
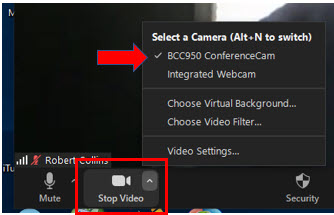
The second menu is the Video button. As with the microphone the up arrow will display the menu and clicking the button will turn the video on and off. Here, you can setup your video to test your camera. In addition, it will display your current camera by a checkmark as shown in the image below. You may not see the Virtual Background or Virtual Filter if you have turned these features off.
Security Setup (Permissions)
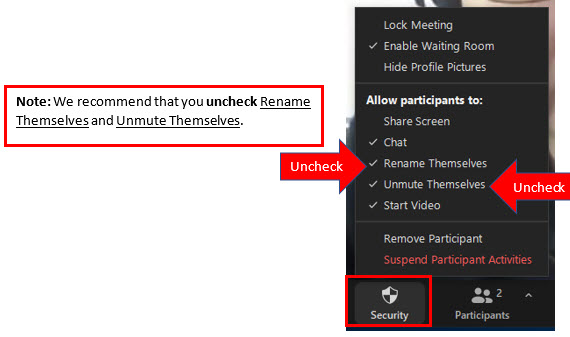
The next menu of the classroom is the Security button. Here, you will set the permissions that the students will have when they enter the class. (You can change the default settings for these features – there is another document showing how to do this.) Some of the options shown here may vary depending on the defaults that were selected. This is also where you give students permission to Share Screen.
Participants and Chat Setup
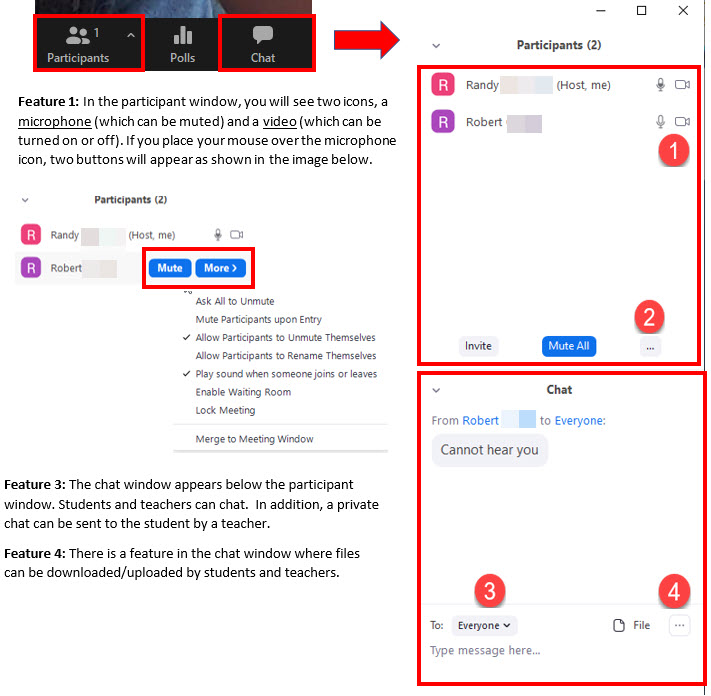
The next two menus we will look at are the Participants and Chat menus. Students joining your session by clicking on the link in your Brightspace shell will automatically appear in the participants list. By default, the chat window will appear below the participant window but both can be undocked and moved.
Resume/Stop Recording
The next menu, Resume/Stop Recording is shown in the image below. A teacher has an option to stop or pause his/her class being recorded.

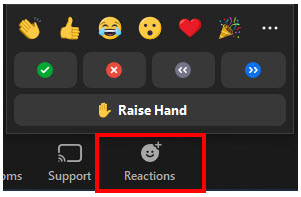
Reaction
The Reaction button is similar to your phone emojis. It has several icons that you can choose from.