How do I print and scan using Brother iPrint&Scan?
Step 1: How to find iPrint and Scan Application
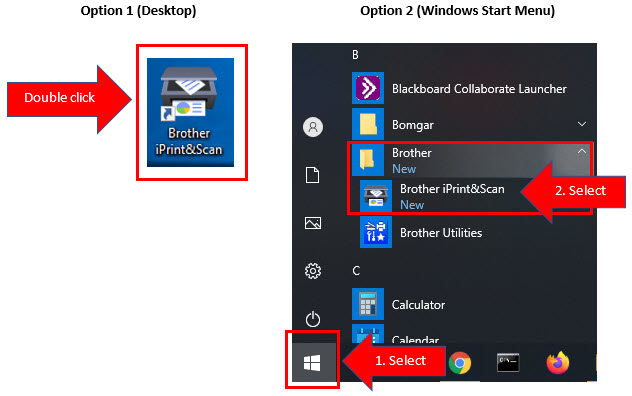
To open iPrint & Scan double click the icon on the Desktop. If the icon is not on the desktop, open the Windows Start Menu and select the Brother folder, Brother iPrint and Scan.
Step 2: iPrint and Scan Dashboard
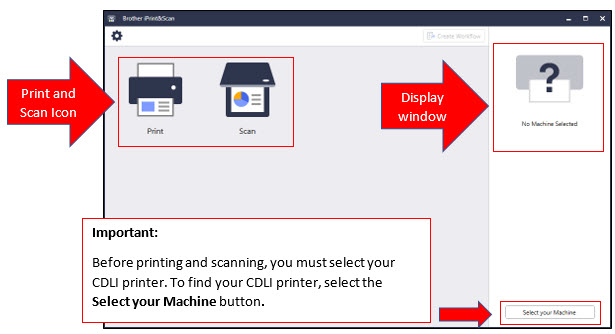
When the application loads, a window will open showing the Brother iPrint and Scan dashboard. There are a couple of things on the dashboard, which you will need to be aware of. The Print and Scan icon is shown on the left of the dashboard. On the right is your display window. This display window will show the printer you have selected. Notice there is no printer selected yet.
Step 3: Selecting your CDLI Printer
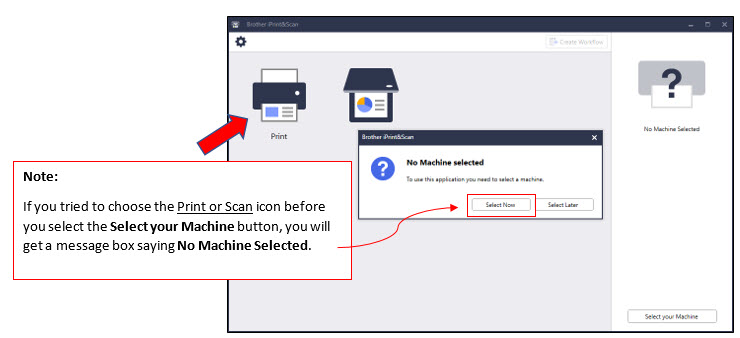
Once you choose the Select Now button, a Select Machine window will pop up. In the image below, a list of machines (printer) will appear and you will need to select one. In this case, the Brother MFC- L5800DW appeared in the list and was selected to be my printer. Select the OK button.
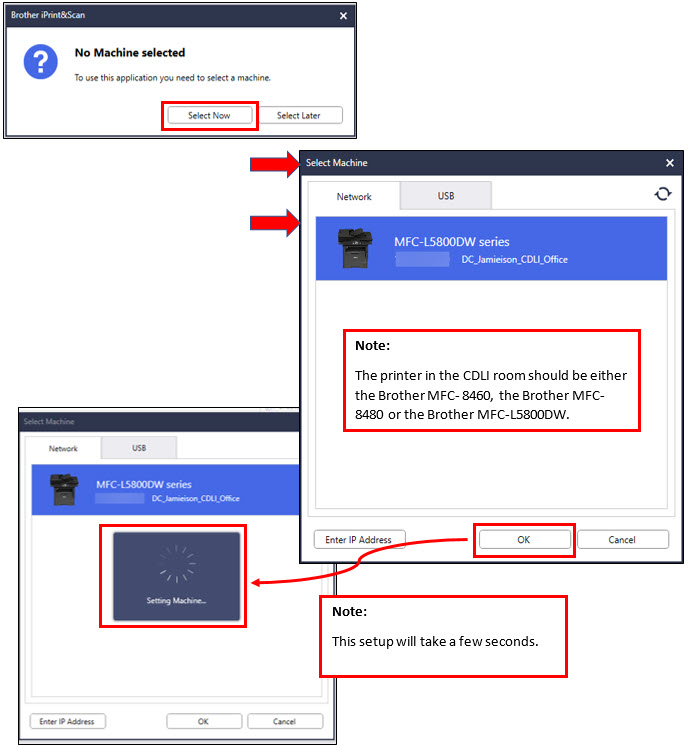
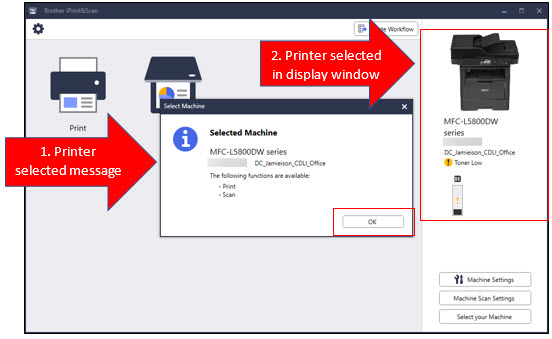
As shown in the image below, a Select Machine message box will pop up and then you can select the OK button. The result of the printer (Machine) selected is now displayed on the right in your display window.
Step 4: To Print
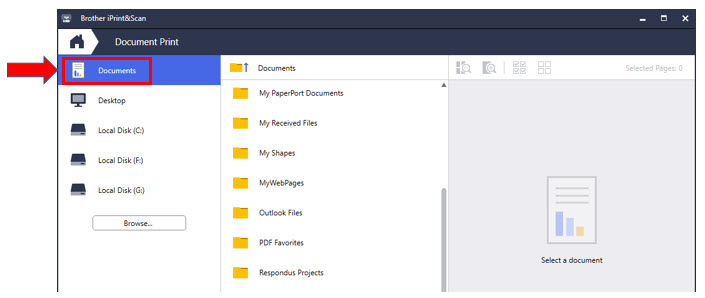
To print any document(s), you have two choices. As shown in the image below, you can select either Option 1: the Photo option or Option 2: the Document Option.
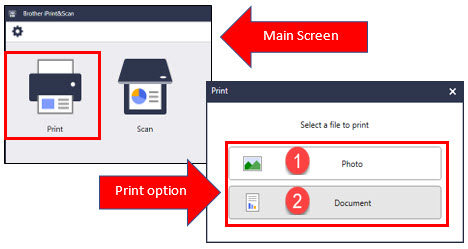
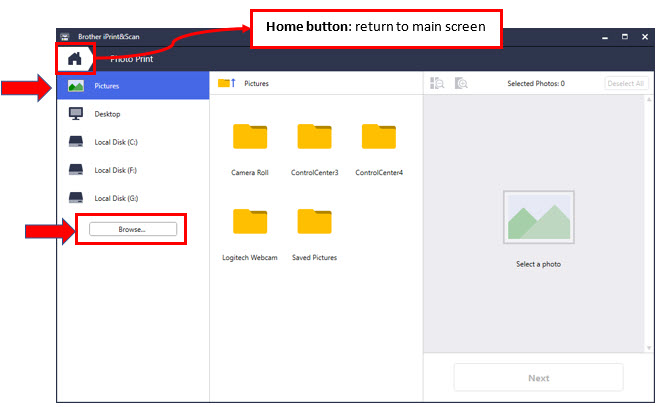
Option 1: the Photo option is usually for printing photos or images you have stored on the computer or any images you have downloaded from a website. By default, it will take you to the Pictures folder. To find the photos stored on the computer, you will need to select the Browse button.
Option 2: the Document option will allow you to select a document stored on the computer to be printed. By default, it will take you to the Document folder.
Step 5: Scan Setup
There are two ways to scan your assignment document for submission to your CDLI teacher. As shown in the image below, you can use either the flatbed (scanner glass) or the document feeder. The flatbed (scanner glass) is suited for a page document or graphic whereas the document feeder is suited for assignments with multiple pages (this method will be used for most assignments).
The first thing you must do before you scan is to set up the Scan Setting features that are appropriate for the material you are scanning. If this is not done, the scanned file may be too large for the assignment drop box. In other words, you will receive an error message stating that the file is too large when sending.
How to set the paper to Scan:
Flatbed (scanner glass): The one page document must be text / graphic side down facing the glass with the top printer cover closed.
Document feeder: You need to have the multiple pages stacked with the text facing up and the top of the document placed into the feeder first. The front panel on the printer will indicate when the paper stack is inserted properly.
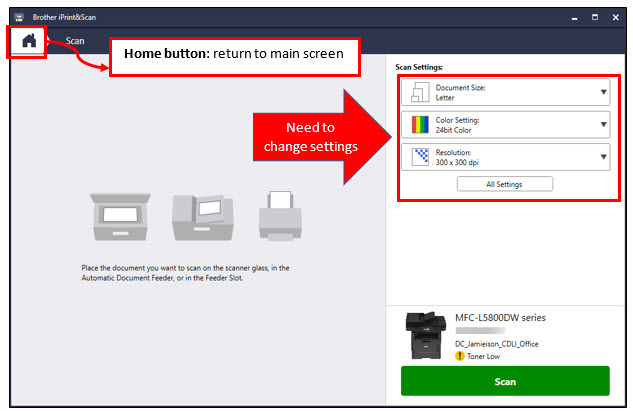
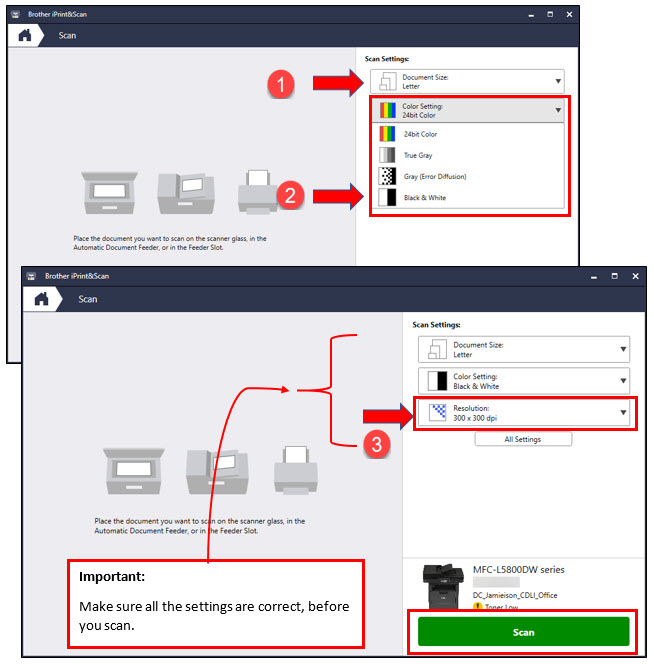
To change the settings, you will need to select from the menu (Drop-down). By default, your Document Size should always be letter size. The Color Settings should always be black and white unless you are scanning pictures or graphics, and the Resolution left at 300x300 dpi.
Step 6: Scanning
Once the assignment is placed in the Document Feeder and the Scan button selected from the Scan menu. A Scanning progress bar window will appear, as shown in the image below.

Step 7: Scan Completed
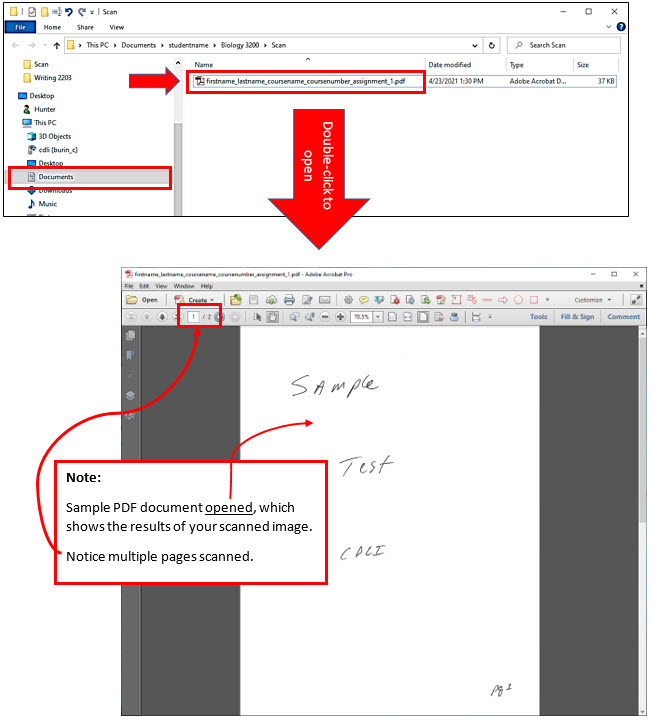
When you have created and saved your scanned document as a PDF file, it can be uploaded to your assignment drop box from your document folder. An example of your PDF document is shown below.