
Help Centre » Student » FAQ » How do I install the Windows Scan app?
How do I install the Windows Scan app?
Alternate Scanning Application
Windows Scan App can be installed by any user and is simple to use to create PDF and image files such as Jpgs. The app is available in the Microsoft Store.
To install and configure the app follow the steps below.
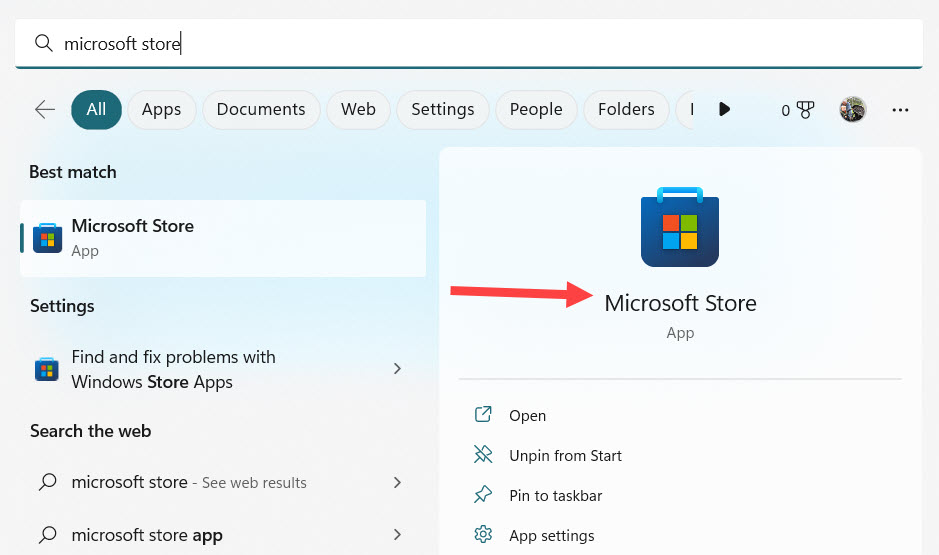
- Click on the Microsoft Store icon or type Microsoft Store in the search bar.
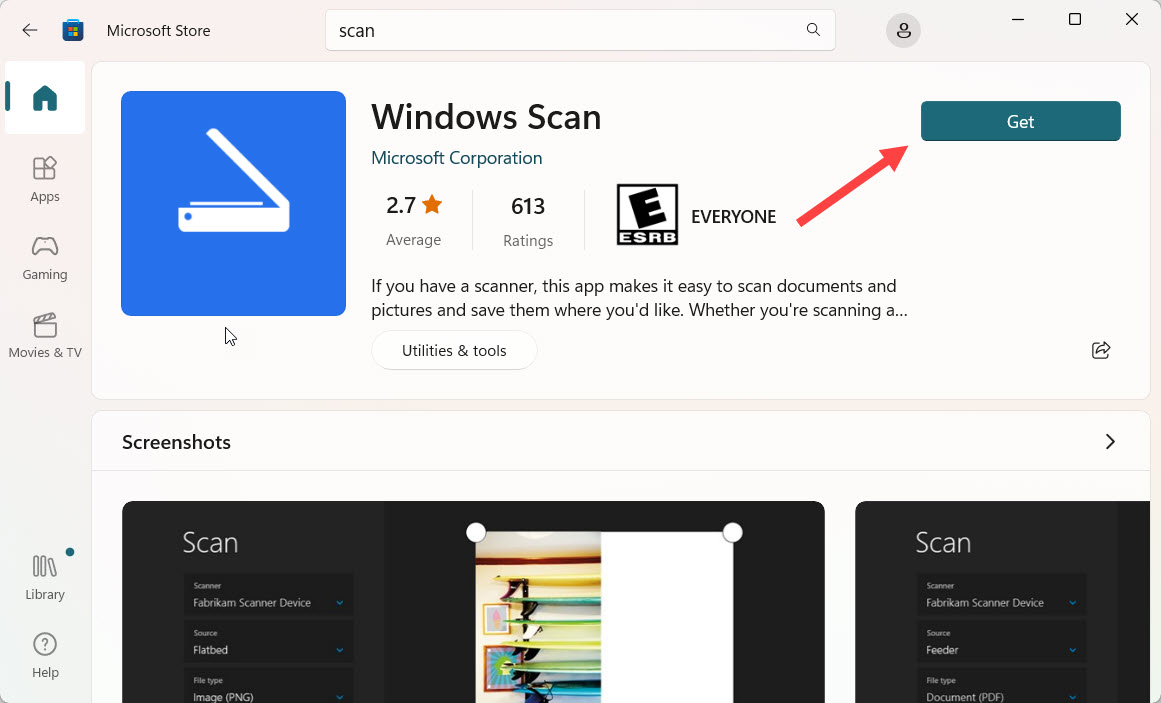
- When the Store window opens, type Scan in the search box and select Windows Scan app.
- When the Windows Scan window appears, click Get.
- If you are asked to Sign in with Microsoft select No, thanks.
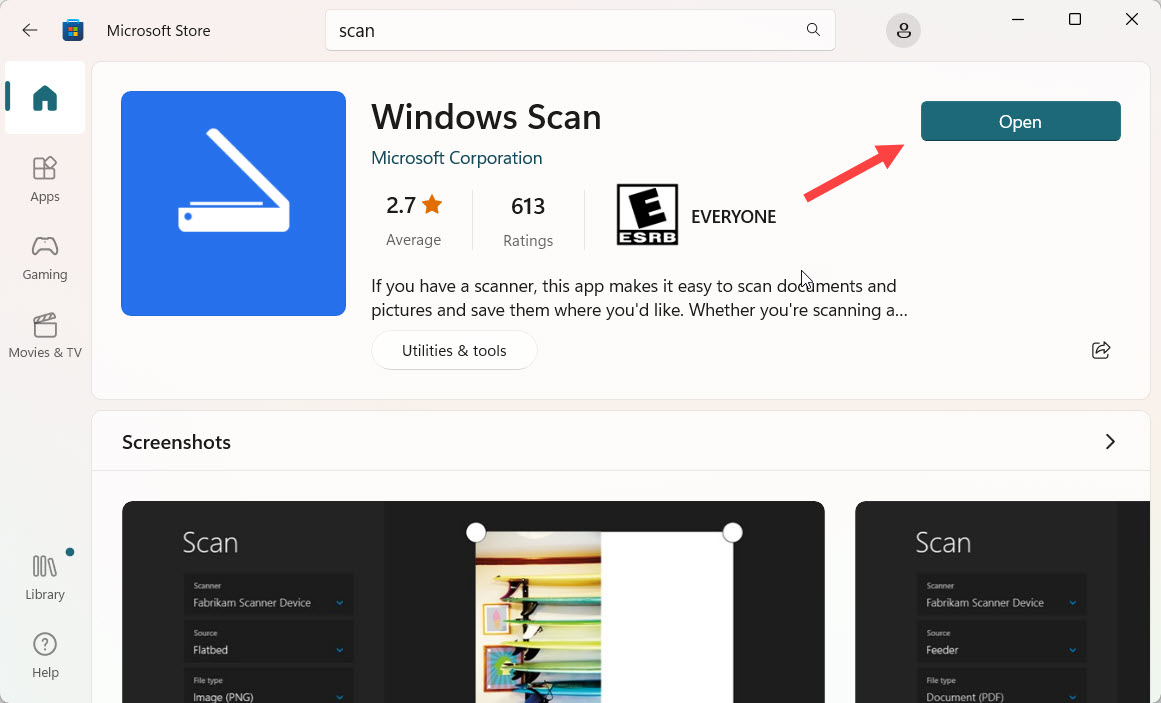
- The app should self install but if it does not, click the Install button which will appear after the app has downloaded. Once the Scan app is installed, select Open.
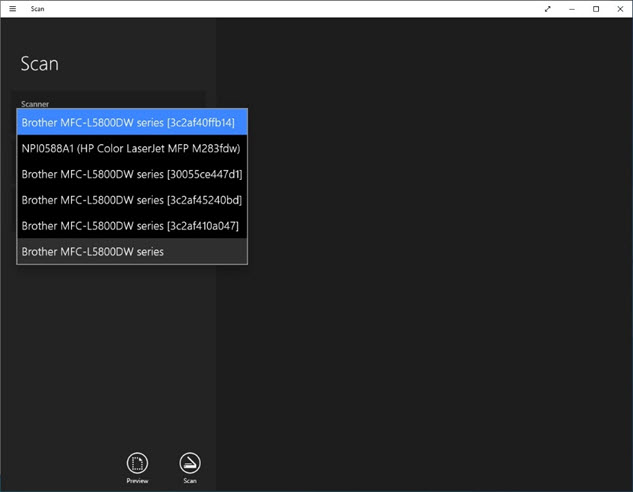
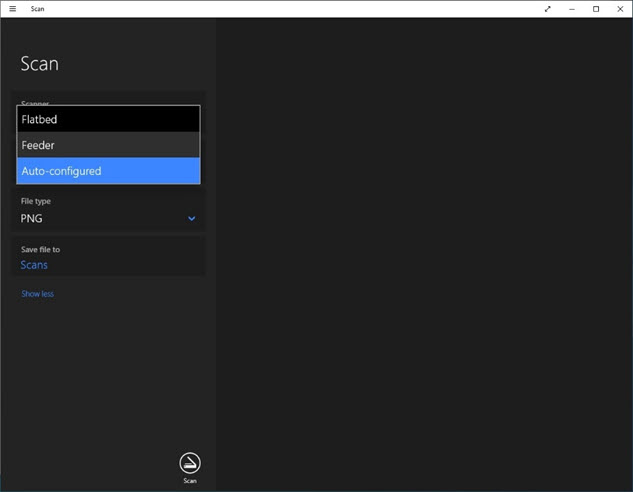
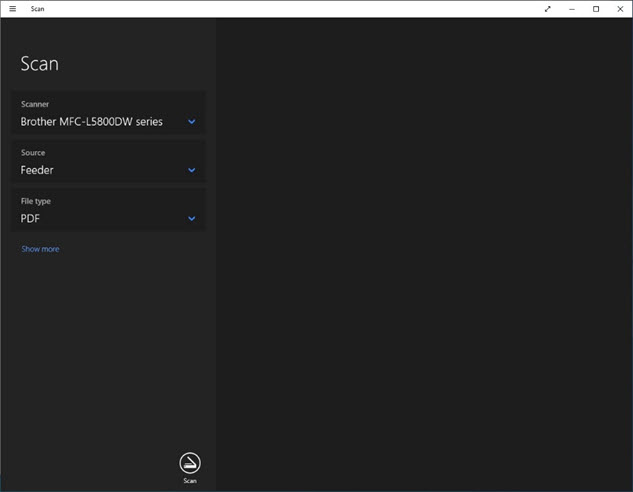
- The Scan app will open. The first thing to do is to make sure that correct printer / scanner is selected. The app will scan your network and may show all the printers in the school. To select the correct printer / scanner click the small down arrow in the Scanner window.
- To select the feeder or flatbed, select Source. Make sure if you are scanning a doc or picture on the flat bed to use Preview first and adjust the sizing handles to select the area you need scanned.
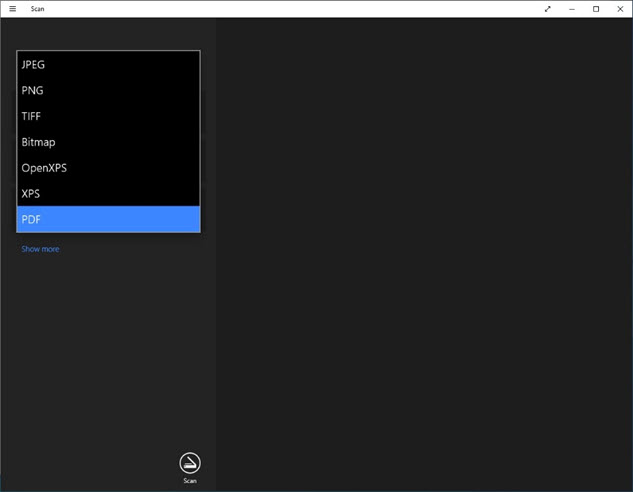
- To select the output file type, open the File Type window and select your choice. Note: the PDF selection will result in a multiple page pdf document if you are scanning from the feeder.
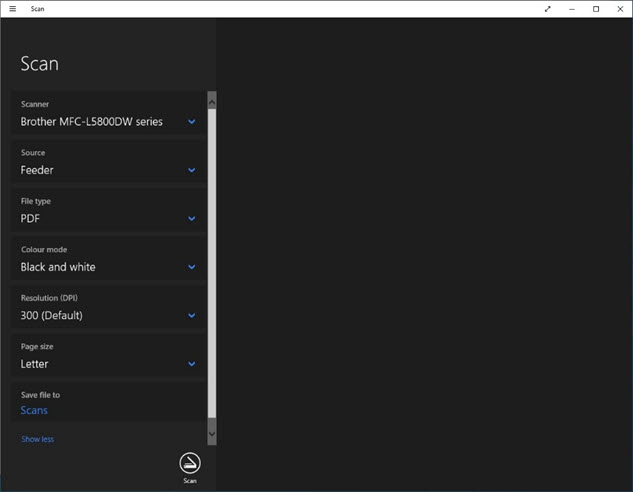
- To change other parameters such as color mode, resolution, page size, and the folder where the scans will be saved select the Show more link.


Note: if no printer / scanner appears in the Scanner window, the drivers for your CDLI printer have not been installed. Report this to your local teacher.
Note: the files will be saved with the name Scan and the date, for example: Scan_20210607.pdf. You will have to change the filename.