
Preregistration
This tutorial is designed to help you navigate CDLI's online pre-registration system. Please refer to this guide as you proceed with the pre-registration process. If you have any questions or problems, please submit a support ticket at https://www.cdli.ca/helpdesk and choose Pre-registration under the Course Registration category.
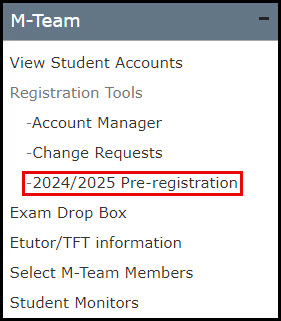
To access the pre-registration system, log in to your CDLI account and click the Pre-registration link. You can find the link in two places: the top banner or the M-Team widget on the right-hand side of the page.

Or
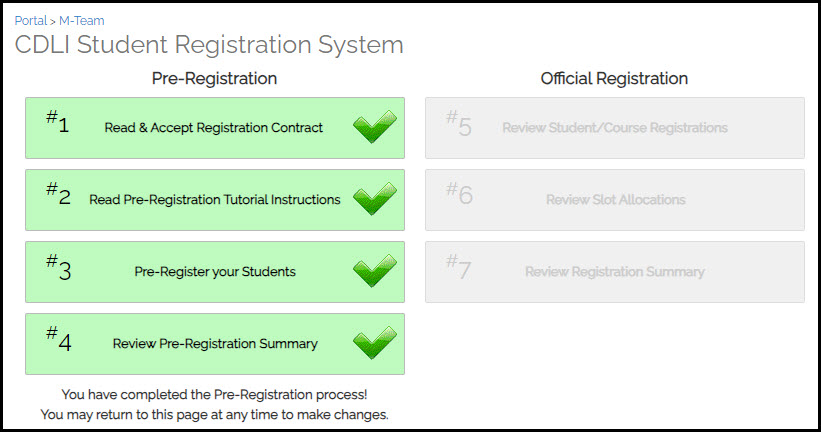
When first entering the registration system during pre-registration, you will be presented with the following screen.
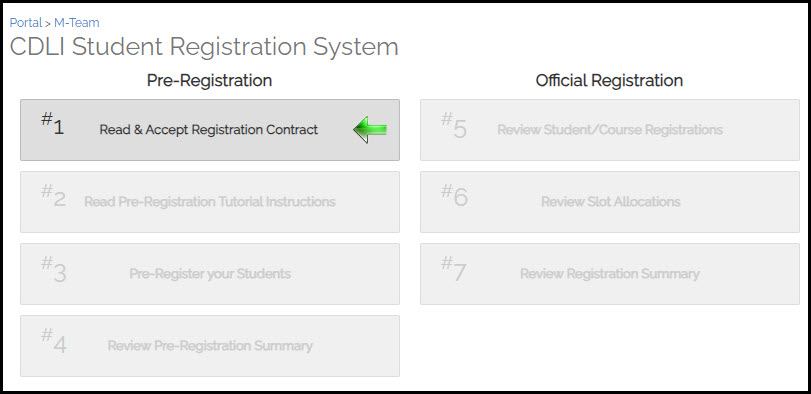
Click on “#1 Read & Accept Registration Contract”.
A new screen will appear with the CDLI School Participation Contract for the upcoming school year.
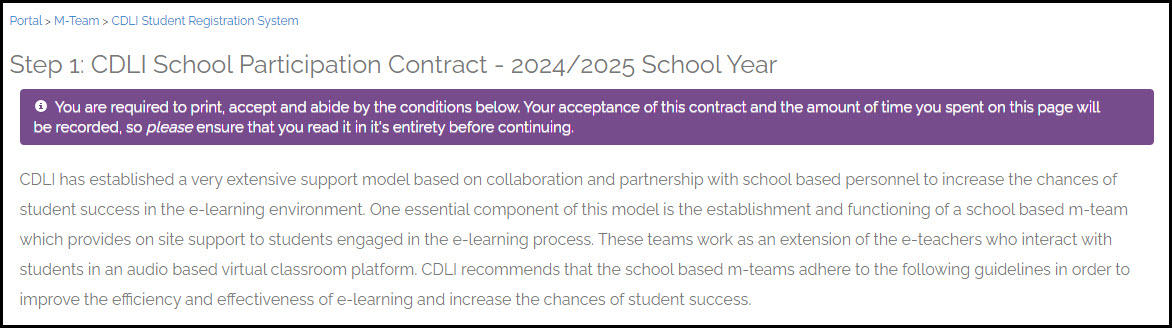
Please print a copy of this Contract for your records.
Read through all of the items. When you are finished, scroll to the bottom of the page and check off “I have read and agree to abide by the terms and conditions outlined above,” and then click the Save and Continue button.

This will bring you back to the main registration system page.
You will notice that, with each completed step, the box's colour turns light green and has a checkmark.
The next step to complete has a green arrow and a different shade of grey as the background colour.
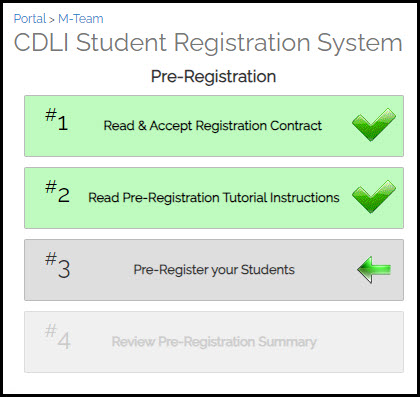
Note: the #2 Read Pre-Registration Tutorial Instructions page simply contains a link to these instructions in the Help Centre.
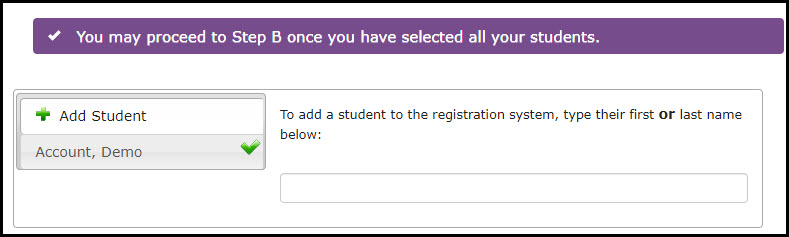
The next step is to select students for pre-registration. Click “#3 Pre-Register your students”. The first time you access this link, no students will be listed.
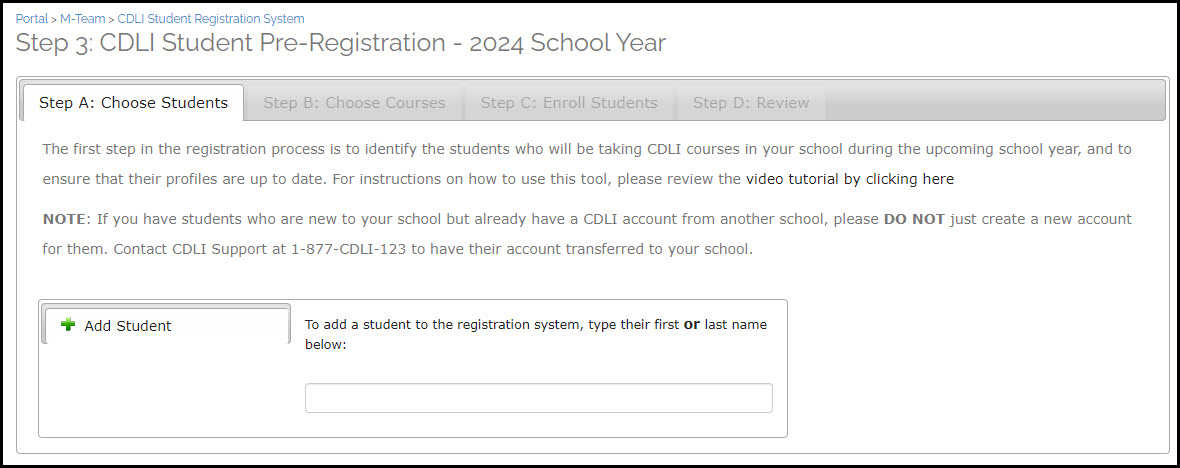
To add a student to pre-registration, start typing their name in the space on the screen. If the student is in your school, their name will appear in the list.
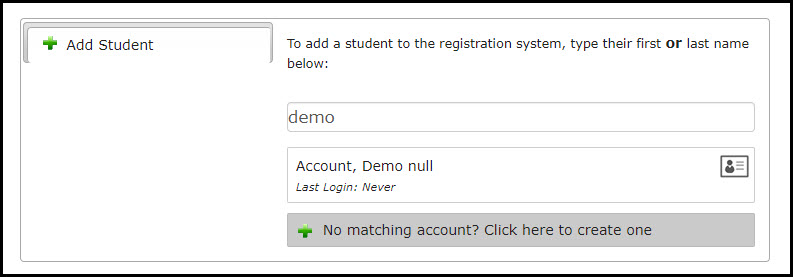
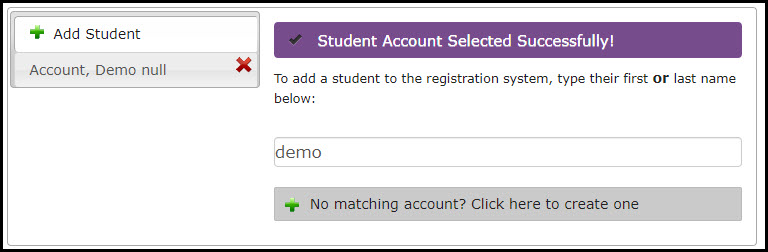
Click the student’s name, and the name will move to the list on the left.
If a student’s name in the list has a red X and not a green checkmark, you must click on their name and update the student’s profile information. Please include the parent/guardian email in the appropriate space. Please do not enter the student’s email address in the parent/guardian section.
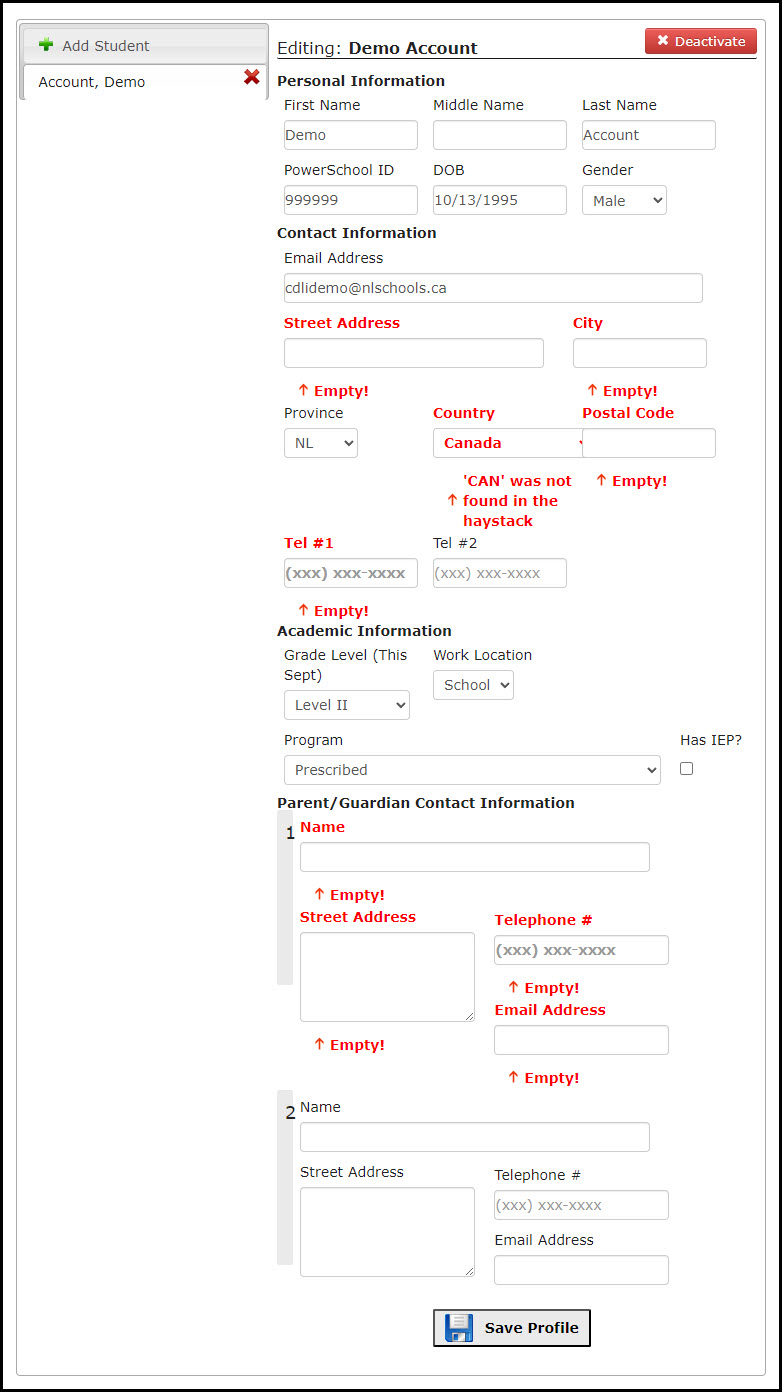
Once all required information has been entered, click the Save Profile button at the bottom of the page. The red X next to the student’s name will change to a green checkmark.
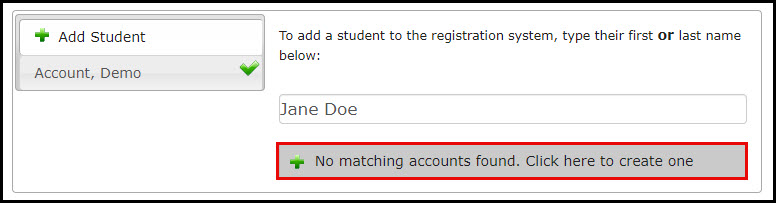
You can now search for another student.
If the student you are searching for is not found, click the button “No matching accounts found. Click here to create one”.
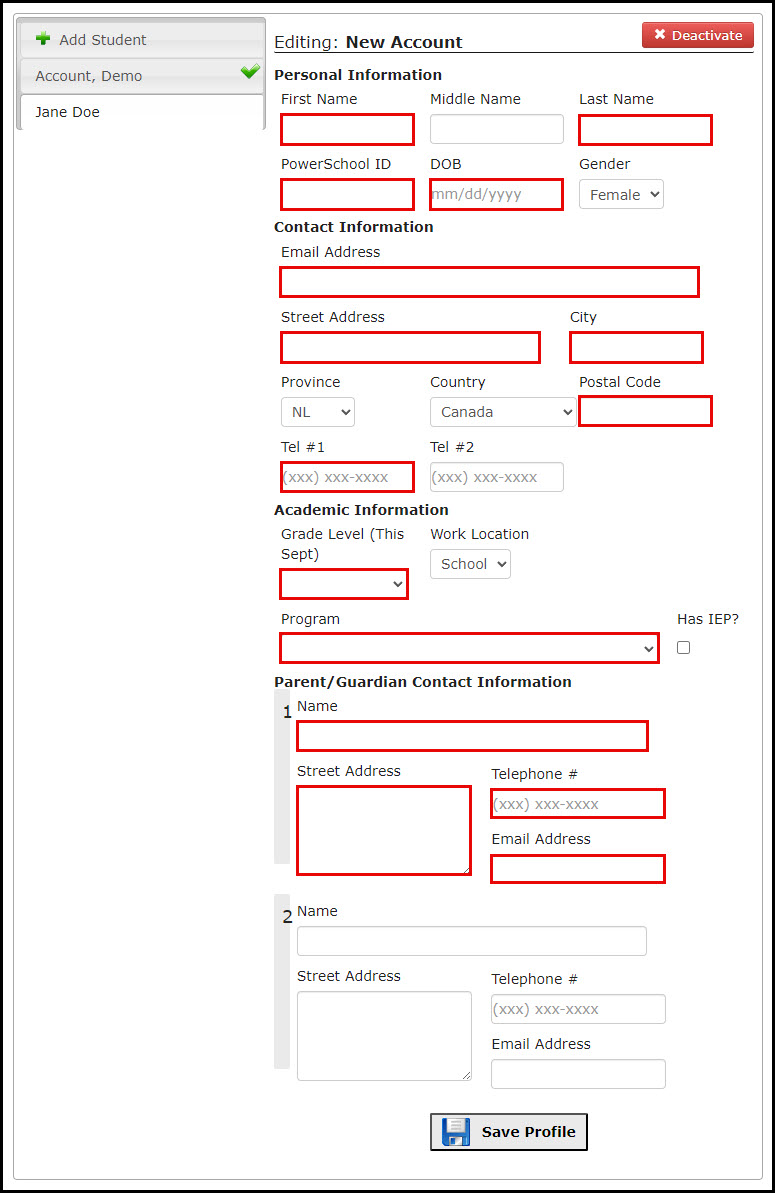
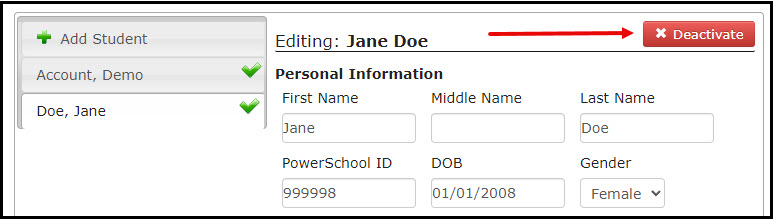
On the profile page, please fill in the required fields. The image below shows the required fields.
You may get one of the following messages when entering the student’s PowerSchool ID while adding a new student.
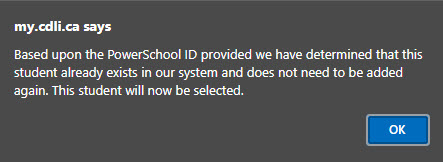
This means the student you are trying to add already has a CDLI account and is already listed in your school. Clicking OK will autofill the student’s data in the various fields. Please double-check that all of the required fields are current and completed.
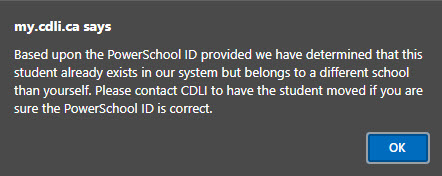
This means the student you are trying to add already has a CDLI account attached to a different school. Clicking OK will close the pop-up window and return you to the main Step A: Choose Students page. Please contact the CDLI Help Desk at https://www.cdli.ca/helpdesk to have the school updated in this student’s profile.
When done entering data, click the Save Profile button at the bottom of the page.
If you wish to remove a student from pre-registration, click on the student’s name on the left and then click the red Deactivate button next to the student’s name.
Once all students are added to the system, you can proceed to the course selection process by clicking Step B - Choose Courses.

To offer a CDLI course in your school, select the checkbox for the course in the Available Courses column. Only select courses in which you wish to enrol students.
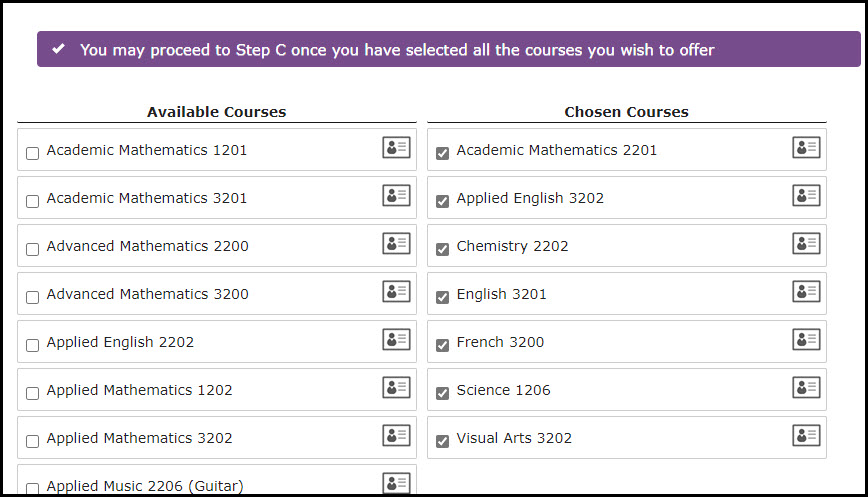
Please add all of the desired courses before continuing with the next step.
When you are done selecting courses, the next step is adding students to your chosen courses. Click “Step C: Enrol Students.”
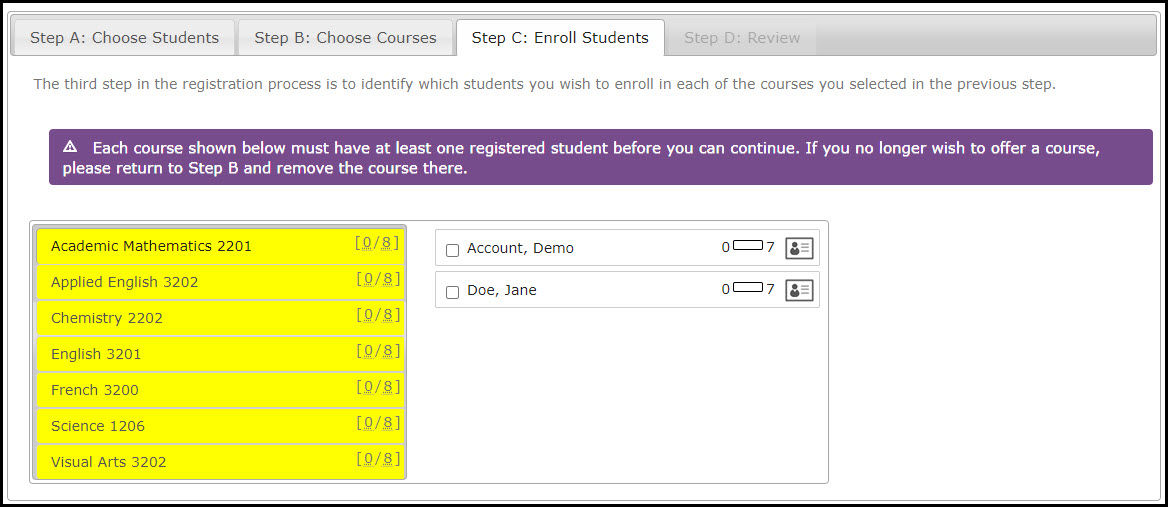
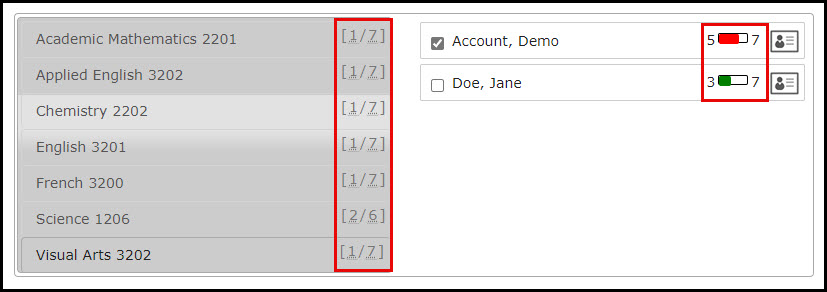
A course highlighted in yellow means that you have not added any students to that course.
To add students to a course, simply click the course name on the left and select the student(s) to add to that course.
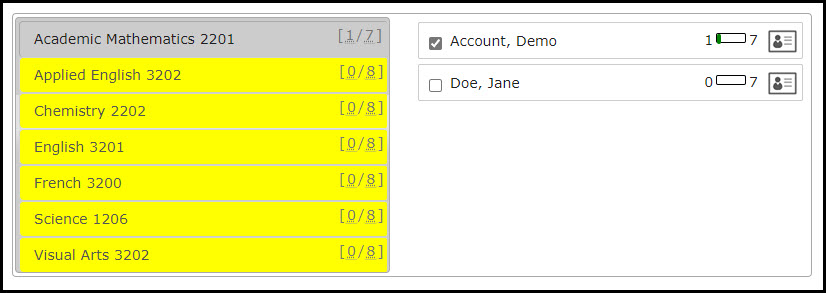
Do this for each of the courses you’ve selected to have offered in your school. When completed, there should be no courses highlighted in yellow.
The numbers in square brackets after the course name show the number of students you have enrolled in the courses. You can have a maximum of eight students per course.
Similarly, the number shown after the student’s name shows the number of courses the student is enrolled in. Students can be registered in a maximum of seven CDLI courses.
If you wish to remove a course from your school, you must remove all of the enrollments first. To do this, please go to Step C: Enroll Students, select the course you no longer wish to offer and uncheck all the students enrolled in that course. This will result in the course showing as yellow. Then, proceed to Step B: Choose Courses and uncheck the course from the right-hand side.
Once you have enrolled each student in the desired courses, you are ready to review your selections. To do this, click Step D: Review. You will see a screen displaying your enrollments by course and by student.
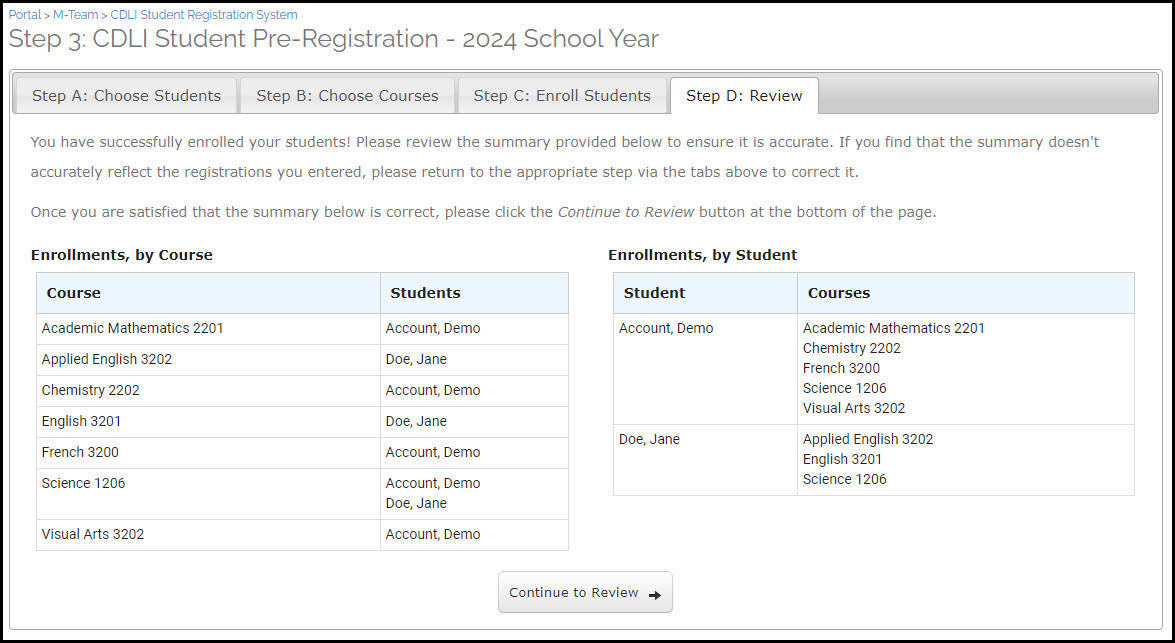
Please review your selections carefully!
You can go back and make changes by clicking on the appropriate tab (Step A, Step B or Step C).
Once you are comfortable with your selections, please click on the “Continue to Review” button at the bottom of the page. This will show you the Pre-Registration System Summary details.
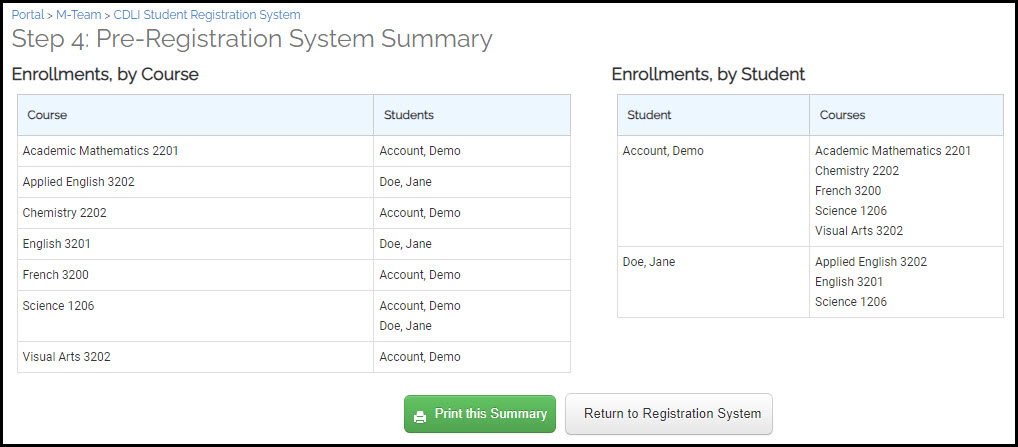
You should click Print this Summary to have a printed copy of your school’s pre-registration enrollment details on hand.
Click the Return to Registration System button to return to the main registration page. Here, you will see all four pre-registration steps marked as completed.
You can return to the registration system to adjust your school’s pre-registration data at any time while the pre-registration system is available. Once pre-registration has closed, you cannot make any changes until the full registration process begins later in the school year.