Asynchronous Course Registration
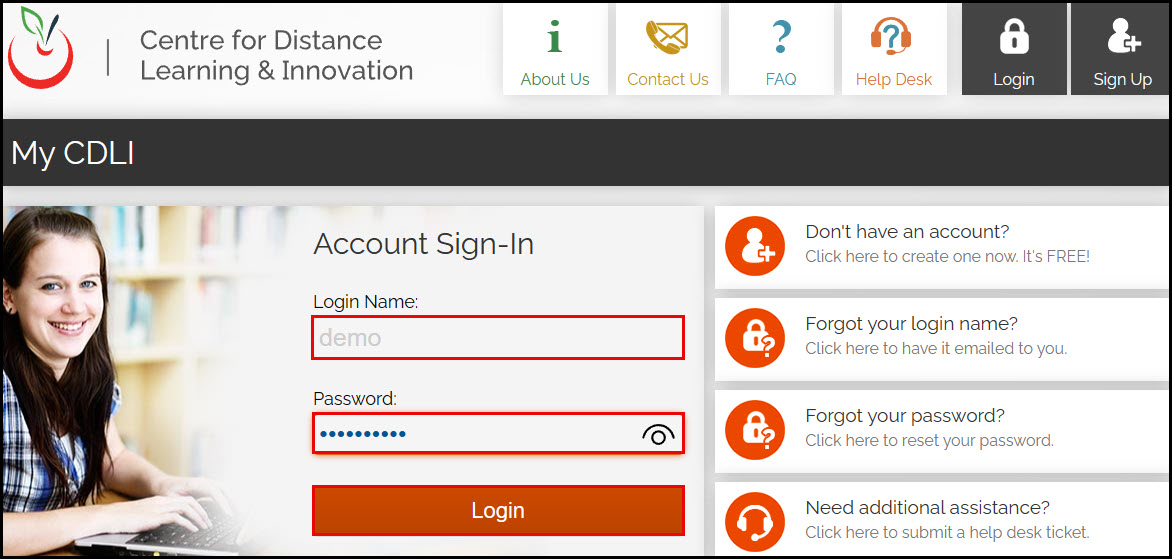
Log into Your CDLI account by going to https://www.cdli.ca and clicking the Login button in the top-right corner of the page. Type in your User Name and Password and click the Login button.
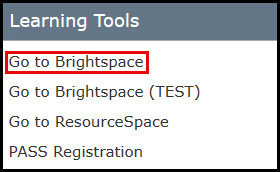
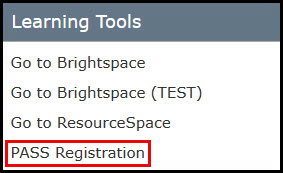
Once logged in, click the Pass Registration link in the Learning Tools widget on the right side of the screen.
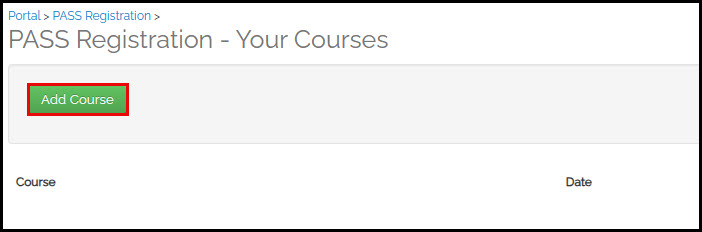
To create a course, click the Add Course button.
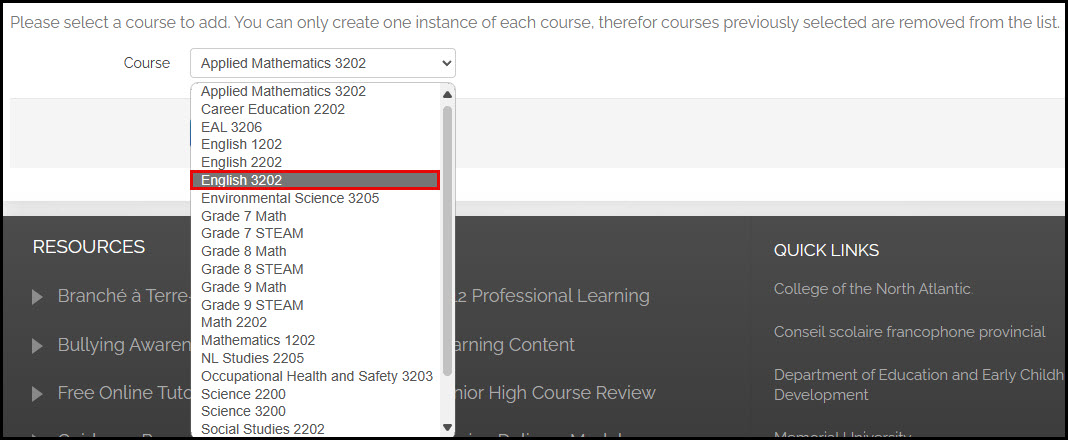
Select the course you want to set up from the dropdown menu.
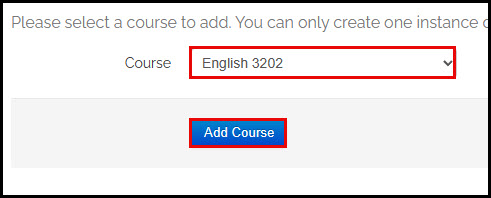
Once you have selected a course, click the Add Course button.
Note: you can create only one instance of a course. Once you have set up a course, it will be removed from the selection list the next time you attempt to create another course.
You will get visual confirmation if the course was successfully created. The background processes will take a few minutes to set up the content and other course materials in Brightspace.
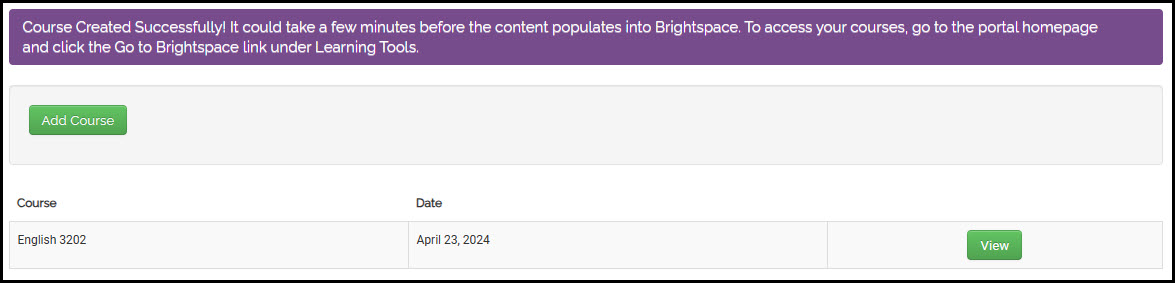
You are now ready to add students. To do this, click the View button next to the course to which you wish to add students.

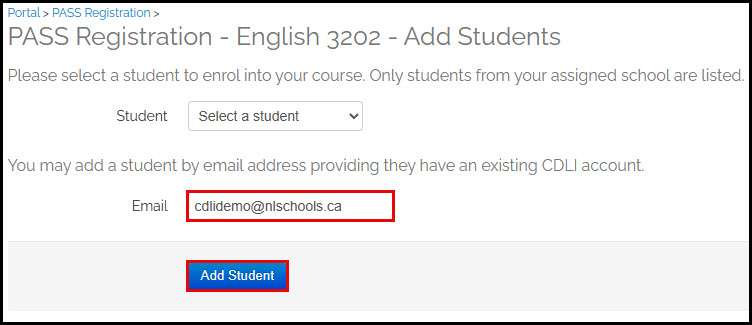
This page will show you the students currently enrolled in the course. You must click the Add Student button to add students to the course.

There are two ways to add students. First, if the student is in your school, you can select their name from the pulldown list and click the Add Student button.
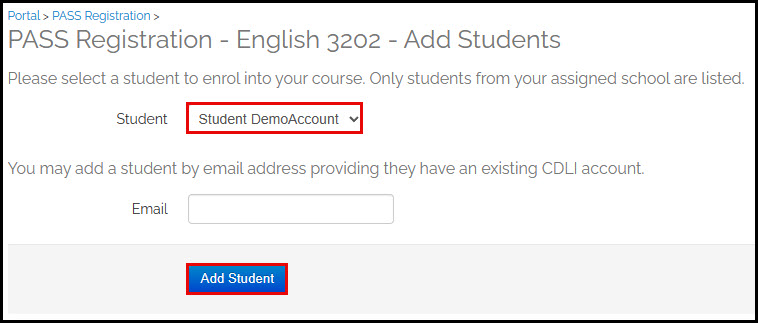
If the student is not in your school, you can enter their email address, providing they have an existing CDLI account, and click the Add Student button.
You will receive a visual confirmation that the student has been enrolled in the course.
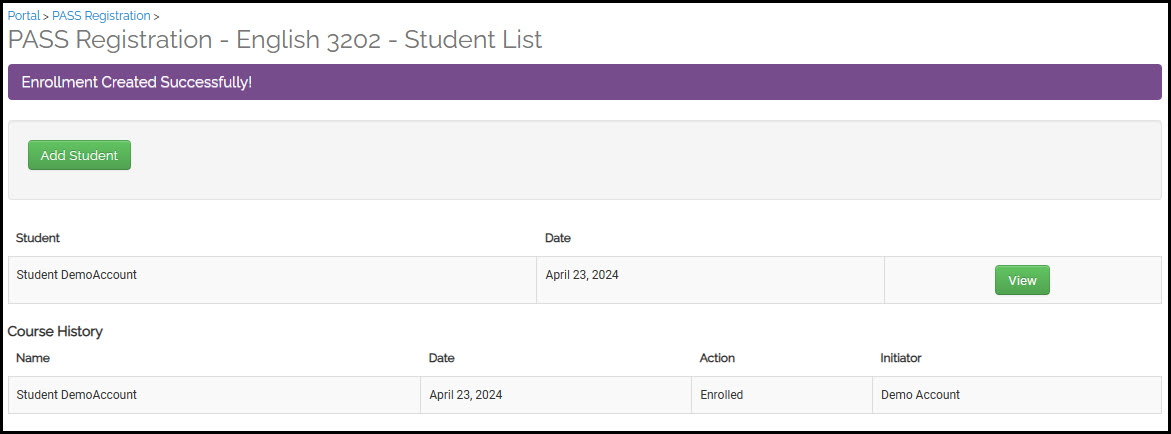
In the Course History section of the page, you will see when a student has been enrolled or dropped, the date the event occurred, and the account that made the change.
If you wish, you can continue adding students to this page.
Once you are done, click the MyCDLI button at the top-right corner of the page and then click the Go to Brightspace link in the Learning Tools widget to access the course in Brightspace.