
Learning Resources
Lesson
Technical illustration is a time honoured technique. It has been in evolution for hundreds of years. It employs all the tools and techniques of technical drawing (sketching, mechanical, and computer based). In addition, a huge array of tools and resources are available for illustrating the technical drawings. This lesson describes a few of the tools and techniques.
Technical illustration requires the detail of technical drawing and the visual elements of a photograph. Photographs tend to also include details that you wish to exclude. Frequently, it is necessary to focus on particular details that are difficult to bring out in the photo. A variety of tools and techniques have evolved to create photo-based technical illustrations. Several are illustrated below
Mechanical Processes (Traditional)
Until the introduction of software-based tools for technical illustrations, illustrations were all constructed through mechanical processes.
Photosketching
One of the photo modification techniques involved a process called photosketching. This entire process is based on the chemistry of photographs. Black and white photographic film and paper has a light-sensitive silver solution suspended in a gelatin coating. Exposure to light when a picture is taken causes changes in the silver solution. Chemicals are then used to stop the reaction, and fix the silver so that it does not change on further exposure. The negative or photograph are essentially trapped in a gelatin coating on the surface of the film or paper.
A photosketch is made by drawing directly on the photo with an India-ink pen. When the drawing is complete, the photo is immersed in an iodine solution which dissolves the gelatin coating, taking the photograph image away with it. After washing, the result is a pen and ink drawing on pure white paper. The image is further manipulated to give different results. The sequence below, taken from a 1985 production on graphics techniques, illustrates some of these processes.
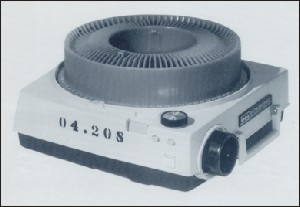
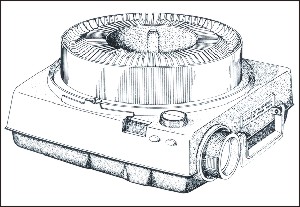
The original photograph was a full sheet of 8" by 10" black and white photo paper.
 |
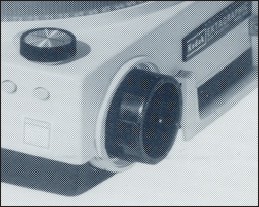 |
Figure Original Photograph |
Figure Photo Details |
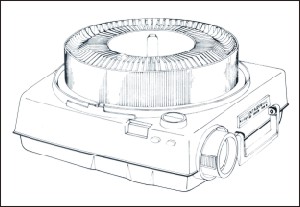
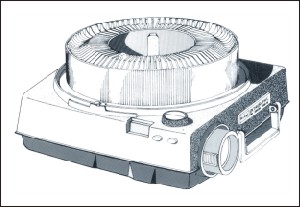
The photosketch was made directly on the photograph, and the photo was bleached out, giving the photosketch shown below. The photosketch is essentially a line drawing.
 |
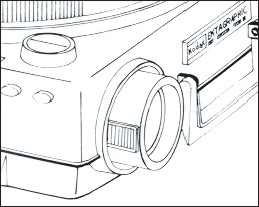 |
Figure Photosketch |
Figure Photosketch Details |
Several exact size photographic copies were made of the photosketch. One was then used to apply stippling with a drafting pen and India ink, as illustrated below. The stippling process allows the illustrator to bring out certain aspects of the image that were not as obvious in the photo. It is also is a more organic process than mechanical tone.
 |
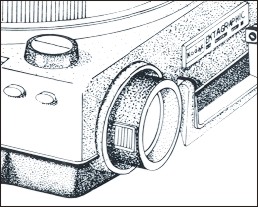 |
Figure Stippled Image |
Figure Stipple Details |
Mechanical tone, or rub-down tone, as it is referred to in the images below is the use of transfer tone that is rubbed onto the image from a large sheet. Typically, pieces were cut to fit with a sharp knife, aligned on the image and rubbed on with a burnishing tool.
 |
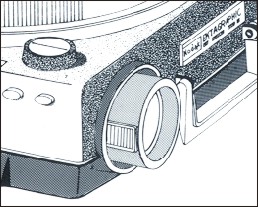 |
Figure Rub-down Tone |
Figure Rub-down Tone Details |
The next image was the result of a dye process. The dyes used for this process are ordinary food dyes.
 |
|
Figure Dyed Image on Kodalith Film |
|
Additional examples can be seen here
Airbrushing
The airbrush is the traditional tool for creating finely detailed technical illustrations with smooth tonal graduations. Airbrushed images are often photographic-like in detail and quality. Where they differ is in the control the airbrush user has in including or excluding specific details. Cars, for example, were frequently presented in brochures and magazine ads through airbrushed technical illustrations.
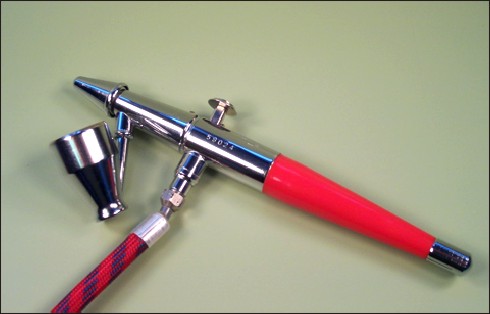
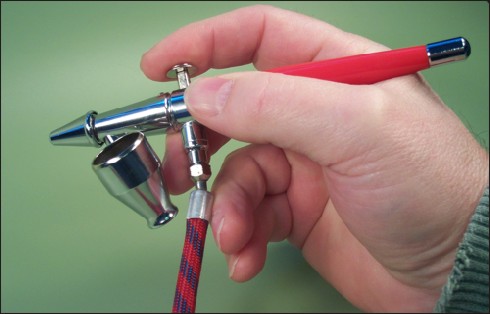
The images below show a typical dual-action airbrush. Dual-action allows the user to control the airflow and the medium (paint) flow independently with the same lever. As you can see, an airbrush is a small, precise spray gun.
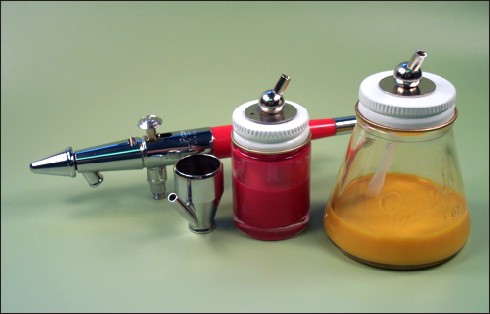
Figure Dual-action Airbrush
Figure Fabric Dye ready for spraying
Figure Correct way to hold the airbrush
Pressing down on the lever increases the airflow. Pulling back on the lever increases paint volume through the nozzle.
Additional Information
Airbrushing is used in a wide variety of applications. If you are interested, here are a few starting points to investigate this process
- Airbrushing Museum
- Airbrush History, including a timeline of inventions
- Airbrushing techniques
- Airbrushing a tiger on a t-shirt demo
- http://www.howtoairbrush.com
Software Processes
Software processes can be used to emulate most traditional technical illustration techniques, including photosketching and airbrushing. Bitmap and vector drawing programs have mainly different approaches, but some vector programs can also manipulate bitmap images as well.
The range of tools and features far exceeds those available from traditional techniques, but this lesson will look at how to emulate only the two traditional techniques introduced above.
Emulating Photosketching
Vector Software
There are two basic techniques for converting a bitmap into a vector drawing equivalent of a photosketch - using the autotrace feature, or drawing directly on the image with the bezier tool. Autotrace works best if the image has strongly defined blocks of colour. It works by following the areas of the image that have the same colour and tonal value. It can be hit-or-miss in terms of giving the effect you want. Drawing directly on the image gives good control and is similar in procedure to traditional pen and ink methods. Like the traditional method, it requires time and patience. Unlike the traditional method, you can modify any line you create any time you want to. With the traditional method, if you make a mistake, you often have to start over.
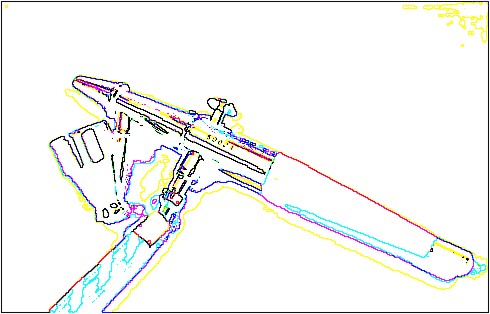
The image below was auto-traced inside Corel Draw 8. As you can see, it is less than helpful. Corel has another trace utility called OCR-Trace. It requires a lot of fiddling to get right.
Figure Results of autotrace
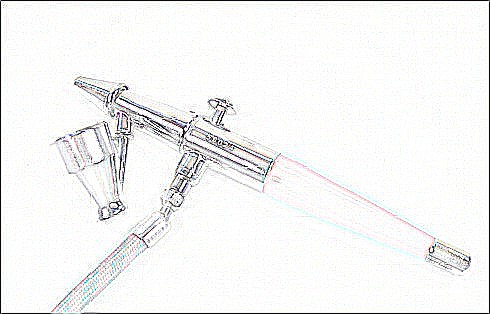
The next figure shows the same image, with the body of the airbrush traced by hand (the yellow line) using the bezier line tool. The time required was about 3 minutes.
Figure Manual Outline Trace
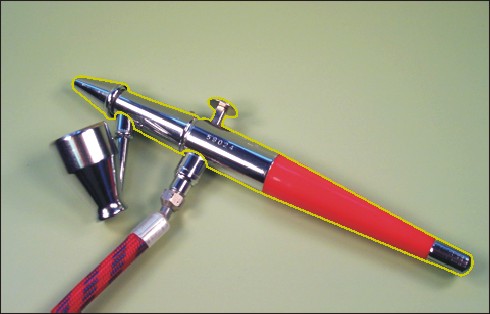
In practice, each component is outlined independently. That way, each component can be treated as an independent object and given any a variety of coloured and pattern fills. Completely tracing all the components would take about 20-30 minutes, which is comparable with traditional photosketching (of course, bleaching the photo out after sketching takes another hour or so).
Bitmap Software
Emulating photosketching in bitmap software is not an easy process. There are two tools in Corel Photo Paint that may be applied - Edge Detect and Find Edges. Neither is satisfactory for photosketching, but they are very useful for other purposes.
Figure Edge Detect
Figure Find Edges
Each has a number of settings that affect how the outline is generated.
Emulating Airbrushing
Vector Software
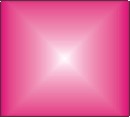
Vector software has no direct equivalent of the airbrush. It uses a variety of tools to get similar effects, but they do not emulate the free motion that is possible with an airbrush. Vector tools include a variety of fountain fills, shadow effects, and transparency. Each of these can emulate, with precise control, one or more of the effects that can be achieved with an airbrush. The sequence below shows several of the effects.
Fill Effects are shown first.
 |
 |
 |
 |
|
|
|
|
Drop Shadow is shown below
Figure Drop Shadow

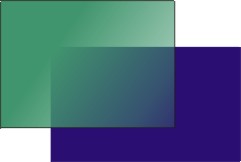
Transparency allows one item to be seen below another.
Figure Transparency
Here are a few examples of emulating airbrush effects by combining one or more of the tools illustrated above.
Figure Radial Fill and Drop Shadow
Figure Layers, Solid fills, Transparency and Drop Shadows
The red lines are included to more clearly show the transparency effects. If they were drawn accurately behind the glass, the red lines would be bent by the diffraction of light reflected through the glass. If you look carefully, you can see the lines and the shadow through the liquid.

Bitmap Software
Paint programs usually have an airbrush tool. Typical settings include colour, size of the spray, feathering (how much the opacity tapers off from the centre to the edge), and opacity/transparency. If used with the mouse, the airbrush tool gives the same size spray for the duration of using it. Many paint programs recognize pressure sensitive graphics tablets/pens such as the Wacom. If the airbrush is used with a pressure sensitive tablet, the size of the spray varies with the pressure you exert on the pen. This corresponds somewhat to the level of control you have with a real airbrush.
The figures below illustrate the airbrush tool in Corel Photo Paint and Painter Classic. Painter Classic has an exceptional airbrush tool when used with the graphics tablet.
Additional Information
These sites provide additional information
- http://www.state-of-entropy.com/sketching.htm
- Corel Photo Paint tutorials
- Corel Draw tutorials
- Painter tutorials
Activity
Assigned activities
The purpose of this activity is to develop capability with creating technical illustrations in software.
Please complete the following Corel Draw (Vector) procedures (Steps 1-4) and Painter Classic procedures (Step 5). These emulate some aspects of airbrush effects and photosketching effects.
|
|
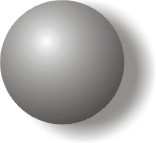
Step 1 Create a shaded 3-D object
|
Part 2 |
Step 2 Add the drop-shadow
Additional instructions
|
Part 3 |
Step 3 Create Transparent Objects
|
Part4a
|
Step 4 Emulating Photosketching
|
Part 5a
|
Step 5 Using Bitmap Airbrushing
|
- Add appropriate entries to your course portfolio and import all .cdr files and bitmap images
- Publish the portfolio to your course web
Test Yourself
There is no self test for this lesson.