What You Need
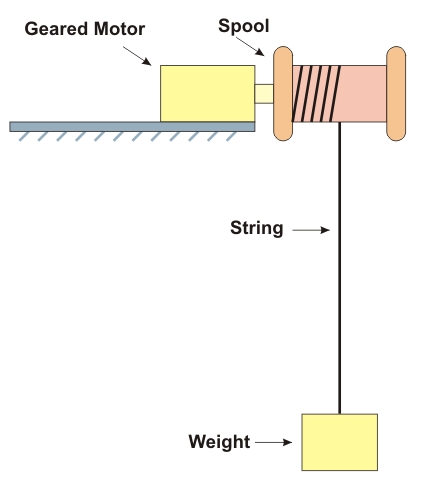
- DC geared motor and attached string spool1
- C Clamp
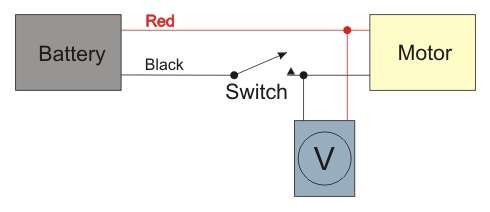
- Battery holder
- 2 D cells
- Alligator clip leads
- Switch
- Multi-meter
- Stopwatch
- Spring scale
- Meter stick
- Weight
1 The modified servo motor (gear motor) needs to have a thread spool attached. If you don't have this done, click the next link for some hints.
![]()
Video. Modified Geared Motor